13. Example .rst File#
If you work with edX documentation source files, you might find this file helpful as a reference. This file contains examples of .rst formatting.
Explanations and more context for each type of element are provided in Working with edX Documentation Source Files.
This file covers the following topics.
13.1. Heading Levels#
#############
Heading 1
#############

*************
Heading 2
*************

===========
Heading 3
===========

Heading 4
************

Heading 5
===========

Heading 6
~~~~~~~~~~~
13.2. Paragraph Text and Commented Text#
This is an example of regular text in paragraph form. There are no indents. As a best practice, break lines at about 80 characters, so that each line has its own line number for commenting in reviews.
Warning
Throughout text and code examples, make sure double quotation marks and apostrophes are straight (”) or (‘), not curly quotatation marks and apostrophes, which might be introduced when text is cut and pasted from other sources or editors.
Boldface is used for labels that are visible in the user interface. The UI text is surrounded by double asterisks. For example, bold.
Italics are rarely used. Text surrounded by single asterisks is rendered in italics.
Monospace text is used for code examples. Text surrounded by double grave
accent characters is rendered in monospace font.
.. comments can be added in a file by starting a line with 2 periods and a space.
In English source files, look for comments addressed to translators from writers.
.. Translators: In this code example, do not translate such and such.
13.3. Ordered and Unordered Lists#
Use hash symbols for ordered lists.
#. Select **Advanced Settings**.
#. Find the **Course Advertised Start Date** policy key.
#. Enter the value you want to display.
Note
Ordered lists usually use numerals. Nested ordered lists (ordered lists inside other ordered lists) use letters.
Use asterisks for unordered (bulleted) lists.
* Who is teaching the course?
* What university or college is the course affiliated with?
* What topics and concepts are covered in your course?
* Why should a learner enroll in your course?
13.3.1. Nested Lists or Content#
You can include content including additional lists and code examples inside lists.
13.3.1.1. Unordered List inside Ordered List#
To include an unordered list inside an ordered list, indent the unordered list three spaces. The first bullet in the unordered list must be flush with the text in the ordered list.
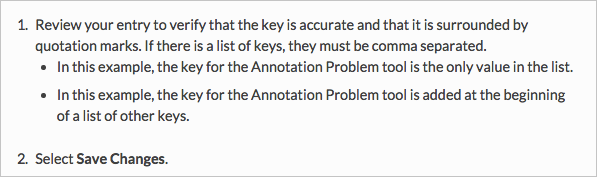
#. Review your entry to verify that the key is accurate and that it is
   surrounded by quotation marks. If there is a list of keys, they must be
   comma separated.

   * In this example, the key for the Annotation Problem tool is the only
     value in the list.

   * In this example, the key for the Annotation Problem tool is added at
     the beginning of a list of other keys.

#. Select **Save Changes**.
13.3.1.2. Ordered List inside Unordered List#
To include an ordered list inside an unordered list, indent the ordered list two spaces. The first number or letter of the ordered list must be flush with the text in the unordered list.
* Review your entry to verify that the key is accurate and that it is
  surrounded by quotation marks. If there is a list of keys, they must be comma
  separated.

  #. In this example, the key for the Annotation Problem tool is the only
     value in the list.

  #. In this example, the key for the Annotation Problem tool is added at the
     beginning of a list of other keys.

* Select **Save Changes**.
13.3.1.3. Unordered List inside Unordered List#
To include an unordered list inside another unordered list, indent the second unordered list two spaces. The first bullet of the second unordered list must be flush with the text in the unordered list.
* Review your entry to verify that the key is accurate and that it is
  surrounded by quotation marks. If there is a list of keys, they must be
  comma separated.

  #. In this example, the key for the Annotation Problem tool is the only
     value in the list.

  #. In this example, the key for the Annotation Problem tool is added at the
     beginning of a list of other keys.

* Select **Save Changes**.

13.3.1.4. Ordered List inside Ordered List#
To include another ordered list inside an ordered list, indent the second ordered list three spaces. The second ordered list must be flush with the text in the numbered list. The first ordered list uses numerals, and the second uses letters.
#. Review your entry to verify that the key is accurate and that it is
   surrounded by quotation marks. If there is a list of keys, they must be
   comma separated.

   #. In this example, the key for the Annotation Problem tool is the only
      value in the list.

   #. In this example, the key for the Annotation Problem tool is added at
      the beginning of a list of other keys.

#. Select **Save Changes**.
13.3.1.5. Code, Images, and Other Content inside Lists#
To include content such as code or an image inside a list, position the code or image directive flush with the text in the list. That is, indent three spaces for ordered lists and two spaces for unordered lists.
#. In the ``lms.yml`` and ``studio.yml`` files, set the value of
   ``CERTIFICATES_HTML_VIEW`` within the ``FEATURES`` object  to ``true``.

   .. code-block:: bash

     "FEATURES": {
         ...
         'CERTIFICATES_HTML_VIEW': true,
         ...
     }

#. Save the ``lms.yml`` and ``studio.yml`` files.
13.4. Conditional Text#
To conditionalize a single paragraph, use either the only:: Partners or
the only:: Open_edX directive, and indent the paragraph under the
directive. You can add the conditional text as regular text or as a note.
Make sure to indent the paragraph under the directive.
.. only:: Partners

 Data about course enrollment is available from edX Insights. You can access
 Insights from the instructor dashboard for your live course: after you select
 **Instructor**, follow the link in the banner at the top of each page. For
 more information, see `Using edX Insights`_.

.. only:: Open_edX

    .. note::
      If you want to require an entrance exam for your course, you also create
      the exam in the course outline. Before you can create an exam, you must
      set your course to require an entrance exam in Studio. For more
      information, see :ref:`Require an Entrance Exam`.
To conditionalize more than a paragraph, use either the only:: Partners or
the only:: Open_edX directive, and then use an include:: directive
indented under the only directive.
.. only:: Open_edX

   .. include:: ../../../shared/building_and_running_chapters/running_course/Section_course_student.rst
13.5. Notes and Warnings#
.. note::
   This is note text. If note text runs over a line, make sure the lines wrap
   and are indented to the same level as the note tag. If formatting is
   incorrect, part of the note might not render in the HTML output.

   Notes can have more than one paragraph. Successive paragraphs must indent
   to the same level as the rest of the note.
Note
This is note text. If note text runs over a line, make sure the lines wrap and are indented to the same level as the note tag. If formatting is incorrect, part of the note might not render in the HTML output.
Notes can have more than one paragraph. Successive paragraphs must indent to the same level as the rest of the note.
.. warning::
   Warnings are formatted in the same way as notes. In the same way, lines
   must be broken and indented under the warning tag.
Warning
Warnings are formatted in the same way as notes. In the same way, lines must be broken and indented under the warning tag.
13.6. Cross-References#
In edX documents, you can include cross-references to other locations in the same edX document, to locations in other edX documents (such as a cross- reference from a location in the Building and Running an edX Course guide to a location in the EdX Learner’s Guide), to JIRA stories, and to external websites. In this section, “EdX documents” refers to the resources, including guides and tutorials, that are listed on docs.edx.org.
For more information about creating cross-references using RST and Sphinx, see Cross-referencing arbitrary locations in the online Sphinx documentation.
13.6.1. Cross-References to Locations in the Same Document#
Cross-references to locations in the same document use anchors that are located above the heading for each topic or section. Anchors can contain numbers, letters, spaces, underscores, and hyphens, but cannot include punctuation. Anchors use the following syntax.
.. _Anchor Text:
The following example shows an anchor for a section, followed by the heading
for that section. SFD SN Keyboard Shortcuts is the anchor text.
.. _SFD SN Keyboard Shortcuts:

******************************
Keyboard Shortcuts for Notes
******************************
To create cross-references to locations in the same document, you can use the anchor only, or you can use your own text. The anchor text is never visible in output. It is replaced by the text of the heading that follows the anchor or the text that you specify.
13.6.1.1. Cross-References Using the Anchor Only#
To add a cross-reference to a specific location in a document and use the text
of the heading for that location as link text, use :ref:`Anchor Text`
syntax, as in the following example.
For more information about using keyboard shortcuts, see :ref:`SFD SN
Keyboard Shortcuts`.
In this example, “SFD SN Keyboard Shortcuts” is the anchor text for a section that is titled “Keyboard Shortcuts for Notes”. Readers will see the following text, and “Keyboard Shortcuts for Notes” will be an active link.
For more information about using keyboard shortcuts, see Keyboard Shortcuts
for Notes.
13.6.1.2. Cross-References Using Specified Link Text#
For internal cross-references that use text other than the heading for the
section that you’re linking to, use :ref:`specified text<Anchor Text>`
syntax, as in the following example.
If you want to, you can use :ref:`keyboard shortcuts<SFD SN Keyboard
Shortcuts>` to create, edit, and view notes.
Note
Do not include a space between the last word of the link text and the opening angle bracket for the anchor text.
In this example, “keyboard shortcuts” is the link text, and “SFD SN Keyboard Shortcuts” is the anchor text for a section that is titled “Keyboard Shortcuts for Notes”. Readers will see the following text, and “keyboard shortcuts” will be an active link.
If you want to, you can use keyboard shortcuts to create, edit, and view your
notes.
13.6.2. Cross-References to Locations in Different edX Documents#
You can create cross-references between different edX documents. For example, you can create a link in Building and Running an edX Course to a topic in the EdX Learner’s Guide. To do this, you use the intersphinx map ID of the document that you want to link to and the anchor text for the section you want. The cross-reference uses the following syntax.
:ref:`intersphinx_map_ID:Anchor Name`
For example:
:ref:`partnercoursestaff:Release Dates`
To find the intersphinx map ID for the document that you want, follow these steps.
Open the conf.py file in the edx-documentation/shared folder, and then locate the following line.
intersphinx_mapping = {In the list that follows this line, find the ID for the document that you want. The text between the single quotation marks (’) at the beginning of each line is the intersphinx map ID for the document.
The following intersphinx map IDs are the most frequently used.
Map ID |
Document |
|
Building and Running an edX Course |
|
Building and Running an Open edX Course |
|
EdX Learner’s Guide |
|
Open edX Learner’s Guide |
|
EdX Research Guide |
|
Using edX Insights |
|
Installing, Configuring, and Running the Open edX Platform |
|
Open edX Developer’s Guide |
|
Partner release notes |
|
Open edX release notes |
13.6.3. Cross-References to JIRA#
For cross-references to JIRA tickets, use the :jira:`PROJECT-ticketnumber`
syntax, as in the following example.
For more information, see :jira:`DOC-2316`.
Note that jira replaces ref for these links.
Readers will see the following text, and “DOC-2316” will be an active link.
For more information, see DOC-2316.
13.6.4. Cross-References to External Web Pages#
A cross-reference to an external web page has several elements.
The URL of the external web page.
The text to use for the cross-reference. This text becomes an anchor in the file that contains the cross-reference.
An
includedirective in the file that contains the cross-reference to the links.rst file that is located in theedx-documentation/en_us/links/folder.An entry in the links.rst file.
To create an external cross-reference, follow these steps.
In the paragraph where you want the cross-reference, add the text that you want to use for the link, formatted as follows (where “Release Pages” is the link text). This creates an anchor out of that text.
The edX engineering wiki `Release Pages`_ provide access to detailed
information about every change made to the edx-platform GitHub
repository.
In the file that contains the cross-reference, add an
includedirective for theedx-documentation/en_us/links/links.rstfile if one does not already exist. Theseincludedirectives are typically at the end of the file... include:: ../../links/links.rst
Note
The path to the links.rst file depends on the location of the file where you are creating the link. For example, the path might be
../../../links/links.rstor../links/links.rst.In the
edx-documentation/en_us/links/links.rstfile, add an entry for the anchor text and the URL of the external website, formatted as follows. Make sure that the anchor text in this file matches the anchor text in the file that contains the cross-reference exactly, including capitalization... _Release Pages: https://openedx.atlassian.net/wiki/display/ENG/Release+Pages
Readers will see the following text. “Release Pages” will be an active link.
The edX engineering wiki Release Pages provide access to detailed
information about every change made to the edx-platform GitHub
repository.
13.7. Image References#
Image references look like this.
.. image:: /Images/Course_Outline_LMS.png
   :width: 100
   :alt: A screen capture showing the elements of the course outline in the LMS.
Image links can include optional specifications such as height, width, or scale. Alternative text for screen readers is required for each image. Provide text that is useful to someone who might not be able to see the image.
13.8. Tables#
Each example in this section shows the raw formatting for the table followed by the table as it would render (if you are viewing this file as part of the Style Guide).
13.8.1. Example of a table with an empty cell#
The empty cell is the second column in the first row of this table.
.. list-table::
   :widths: 25 25 50

 * - Annotation Problem
   -
   - Annotation problems ask students to respond to questions about a
     specific block of text. The question appears above the text when the
     student hovers the mouse over the highlighted text so that students can
     think about the question as they read.
 * - Example Poll
   - Conditional Module
   - You can create a conditional module to control versions of content that
      groups of students see. For example, students who answer "Yes" to a
      poll question then see a different block of text from the students who
      answer "No" to that question.
 * - Example JavaScript Problem
   - Custom JavaScript
   - Custom JavaScript display and grading problems (also called *custom
     JavaScript problems* or *JS input problems*) allow you to create a
     custom problem or tool that uses JavaScript and then add the problem or
     tool directly into Studio.
Annotation Problem |
Annotation problems ask students to respond to questions about a specific block of text. The question appears above the text when the student hovers the mouse over the highlighted text so that students can think about the question as they read. |
|
Example Poll |
Conditional Module |
You can create a conditional module to control versions of content that groups of students see. For example, students who answer “Yes” to a poll question then see a different block of text from the students who answer “No” to that question. |
Exampel JavaScript Problem |
Custom JavaScript |
Custom JavaScript display and grading problems (also called custom JavaScript problems or JS input problems) allow you to create a custom problem or tool that uses JavaScript and then add the problem or tool directly into Studio. |
13.8.2. Example of a table with a header row#
.. list-table::
   :widths: 15 15 70
   :header-rows: 1

   * - First Name
     - Last Name
     - Residence
   * - Elizabeth
     - Bennett
     - Longbourne
   * - Fitzwilliam
     - Darcy
     - Pemberley
First Name |
Last Name |
Residence |
|---|---|---|
Elizabeth |
Bennett |
Longbourne |
Fitzwilliam |
Darcy |
Pemberley |
13.8.3. Example of a table with a boldface first column#
.. list-table::
   :widths: 15 15 70
   :stub-columns: 1

   * - First Name
     - Elizabeth
     - Fitzwilliam
   * - Last Name
     - Bennett
     - Darcy
   * - Residence
     - Longboure
     - Pemberley
First Name |
Elizabeth |
Fitzwilliam |
|---|---|---|
Last Name |
Bennett |
Darcy |
Residence |
Longboure |
Pemberley |
13.8.4. Example of a table with a cell that includes an unordered list#
The blank lines before and after the unordered list are critical for the list to render correctly.
.. list-table::
   :widths: 15 15 60
   :header-rows: 1

   * - Field
     - Type
     - Details
   * - ``correct_map``
     - dict
     - For each problem ID value listed by ``answers``, provides:

       * ``correctness``: string; 'correct', 'incorrect'
       * ``hint``: string; Gives optional hint. Nulls allowed.
       * ``hintmode``: string; None, 'on_request', 'always'. Nulls allowed.
       * ``msg``: string; Gives extra message response.
       * ``npoints``: integer; Points awarded for this ``answer_id``. Nulls allowed.
       * ``queuestate``: dict; None when not queued, else ``{key:'', time:''}``
         where ``key`` is a secret string dump of a DateTime object in the form
         '%Y%m%d%H%M%S'. Nulls allowed.

   * - ``grade``
     - integer
     - Current grade value.
   * - ``max_grade``
     - integer
     - Maximum possible grade value.
Field |
Type |
Details |
|---|---|---|
|
dict |
For each problem ID value listed by
|
|
integer |
Current grade value. |
|
integer |
Maximum possible grade value. |
13.9. Code Formatting#
13.9.1. Inline code#
In inline text, any text can be formatted as code (monospace font) by
enclosing the selection within a pair of double “grave accent” characters (`).
For example, ``these words`` are formatted in a monospace font when the
documentation is output as PDF or HTML.
13.9.2. Code blocks#
To set text in a code block, end the previous paragaph with 2 colons, leave one line before the intended code block, and make sure the code block is indented beyond the first colon.
For example, this is the introductory paragraph
::

 <p>and this is the code block following.</p>
Alternatively, use the code-block tag. Optionally, indicate the type of code after the 2 colons in the tag, which results in the tags within the code block being displayed in different colors.
.. code-block:: xml

         <problem>
             <annotationresponse>
                 <annotationinput>
                   <text>PLACEHOLDER: Text of annotation</text>
                     <comment>PLACEHOLDER: Text of question</comment>
                     <comment_prompt>PLACEHOLDER: Type your response below:</comment_prompt>
                     <tag_prompt>PLACEHOLDER: In your response to this question, which tag below
                     do you choose?</tag_prompt>
                   <options>
                     <option choice="incorrect">PLACEHOLDER: Incorrect answer (to make this
                     option a correct or partially correct answer, change choice="incorrect"
                     to choice="correct" or choice="partially-correct")</option>
                     <option choice="correct">PLACEHOLDER: Correct answer (to make this option
                     an incorrect or partially correct answer, change choice="correct" to
                     choice="incorrect" or choice="partially-correct")</option>
                     <option choice="partially-correct">PLACEHOLDER: Partially correct answer
                     (to make this option a correct or partially correct answer,
                     change choice="partially-correct" to choice="correct" or choice="incorrect")
                     </option>
                   </options>
                 </annotationinput>
             </annotationresponse>
             <solution>
               <p>PLACEHOLDER: Detailed explanation of solution</p>
             </solution>
           </problem>